This post may contain affiliate links which means I may receive a commission for purchases made through links.

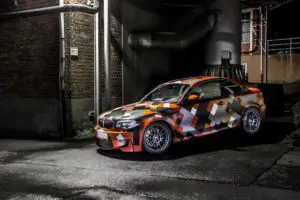
With proper care, car vinyl wraps can stay in good condition for several years. Nonetheless, it’s almost impossible to keep the vinyl wrap free from blemishes and scuff marks during its lifespan.
Although you can’t simply polish these unsightly marks out, removing them is not that difficult. In fact, there are various options you can use to remove scuff marks from your car’s vinyl wrap, depending on their severity.
At the same time, you should avoid using harsh chemicals to get rid of these marks. Or else you’ll end up damaging the vinyl wrap film instead of repairing it.
In this article, I’ll show you 2 simple and handy methods you can use to remove scuff marks from your car’s vinyl wrap without using any harsh chemical product!
Method 1: Using a vinyl patch to remove scuff marks from vinyl wrap
Things you’ll need
- The same vinyl wrap used on your car
- Heat gun for vinyl wrap
- Razor blade
- 2500 grit sandpaper
- Microfiber towel
- Spray bottle (optional)
How to repair a gouge or scratch in your car’s vinyl wrap
Patching your car’s vinyl wrap can be a time-consuming process, but that will depend on how perfect you want it to look and the type of vinyl wrap on your car. Whichever the case, here are the steps you need to follow:
Clean the damaged area
Start by cleaning the affected area with a microfiber towel and soapy water to get rid of grease, wax, and other debris on the car’s surface. Applying the vinyl patch while these contaminants are on the car’s surface will affect its adherence to the car.
Remove the damaged vinyl parts and level the gouge
Using a sanding block with wet 2500-grit sandpaper, remove the damaged vinyl parts and level the gouge while the surface is still wet. However, deep scratches and some gouges may require lower-grit sandpaper.
Either way, make sure you apply light pressure on the sanding block and sand horizontally during this process.
Clean the surface again and dry
Once you’re done leveling the gauge, clean the affected area and dry it with a car-drying microfiber towel before you proceed to the next step.
Measure the size of the vinyl patch
Measure the size of the vinyl needed for the patch and cut a film that is large enough to cover the affected area and overlap with the existing wrap.
Apply the vinyl patch
Remove the adhesive backing on the cut vinyl patch and place it on the damaged area. Start applying the vinyl patch from the center and push it towards the outer edges with your fingers, old credit card, or squeegee.
Remove any air bubbles as you work your way up & down the vinyl patch.
Activate the adhesive
If you’re having a hard time trying to stretch the vinyl patch, use a hairdryer or heat gun to soften it up. However, you need to be very cautious while doing so as over-stretching the patch can lead to tears in the future or affect its appearance.
Run the nozzle of the heat gun around the vinyl patch to activate the adhesive and apply light pressure to attach it to the car surface.
Remove the excess vinyl
Finally, cut the excess vinyl patch with a razor blade and tuck in the remaining parts to areas like curves and creases.
Method 2: Using the heat gun method to remove scuff marks from vinyl wrap
Since vinyl wrap is made from a thermoplastic material, you can use heat to reform it multiple times. So, if there are any visible swirl marks in the wrap, applying heat gently will allow the material to reform to a flat and uniform surface.
This gives vinyl wraps exceptional ‘self-healing’ properties, making it easy to repair any visible scuff marks.
On the downside, this technique will not repair deep scratches in the wrap. However, it may help to improve the gloss effect of the car vinyl wrap.
That said, here’s how to remove scuff marks from car vinyl wrap with a heat gun;
Clean the car surface
The 1st step is to ensure the area you want to repair is free from any contaminants. To accomplish that, thoroughly clean the car surface to remove any waxes and sealants. Use a car-drying microfiber cloth to dry the surface after cleaning it.
Apply heat
Although you can use a hairdryer for this step, the best heat gun for the vinyl wrap is recommended. That said, set your heat gun to the lowest settings and move its nozzle around the scuff marks on the vinyl wrap, keeping it at least 20 – 30 cm away from the car surface.
More importantly, keep the nozzle moving around instead of holding it in one place to avoid burning the vinyl wrap.
Repeat the heating process until you remove all the swirl marks from vinyl wrap
Repeat the heating process multiple times until you slowly get rid of all the minor swirl marks on your car’s vinyl wrap.
Perform vinyl wrap correction (Optional)
Similar to car paint correction, you can use a dual-action polishing machine to treat most types of vinyl wraps. However, you should apply less pressure and abrasives when polishing the vinyl wrap since it’s not as durable as car paint.
Final Word
Knowing how to remove scuff marks and gouges from your car’s vinyl wrap will help you maintain the car’s appearance. More importantly, it will help you protect your car’s paintwork, instead of leaving it exposed to various weather elements.

Leave a Reply