This post may contain affiliate links which means I may receive a commission for purchases made through links.
A clear coat refers to the transparent, glossy acrylic or polyester layer applied on top of the car’s base/ colored coat, giving the car’s exterior a dazzling look. At the same time, it protects the colored coat from corrosion, scratches, dust, UV rays, and other environmental elements.
As you would expect though, the clear coat deteriorates over time because of UV damage or oxidation, causing it to bubble, peel or fall off, which can trigger a chain reaction.
For that, it’s important to remove the entire clear coat and replace it without damaging the car paint.
But, where do you get started? More importantly, how do you remove the clear coat from your car without damaging the underlying colored/ base coat?
Well, continue reading this guide to learn how to remove the clear coat without damaging the car paint! First, let’s look at some of the items you’ll need to undertake this project successfully.
Things you’ll need to remove clear coat without damaging car paint
Like any other project, you need to gather all the tools and materials you’ll need to remove the clear coat efficiently without damaging the underlying paint job. Some of these items include;
- Water & washing house for rinsing and preparing the car before the clear coat removal process commences.
- 400-, 800-, 1000- and 1200-grit sandpaper.
- Specialized buffing Compound. Using a specialized clear coat removal agent or a buffing compound is the safest way to remove the clear coat without damaging the underlying base coat.
- 100% wool buffing pads. These pads are more efficient in the material than microfiber towels since they don’t budge. In addition, they can hold up as much buffing compound as you want.
- Electrical polishing machine. Polishing the entire car surface by hand is a long and difficult process, yet you’ll not get a spotless, uniform finish at the end. However, an electrical polisher gets the job done faster without requiring excessive physical labor. Plus, it’s a reasonable investment as you can use it to polish and wax your car regularly.
- Spray detailer. A quick wax spray detailer is used to clean and finish off the car surfaces after removing the buffing compound and clear coat. In addition, it elevates the shine and gets rid of all harmful substances from the car’s surface to restore the vehicle to a smooth and shiny paint job.
- Best Car wax (Optional). Car waxing is an important procedure for any car exterior treatment. However, it can be quite a laborious process if you don’t have the necessary electric tools.
Step by Step guide on how to remove the clear coat without damaging car paint
Step 1: Soak the 400-grit sandpaper in water
Before you even start washing your car, immerse the 400-grit sandpaper in water to prepare for the sanding process. This allows the 400-grit sandpapers to remove the clear coat without producing a lot of dust.
In the meantime, you can go ahead and wash the car as you let the sandpaper soak in water.
Step 2: Wash the Car
Thoroughly washing your car before you remove the clear coat is an essential step as it promotes an easier and more effective clear coat removal process.
More importantly, it ensures that the entire surface doesn’t contain any dirt or debris as this may lead to further damage when you start applying treatment products to your car.
Next, soak the entire vehicle with a garden hose. Then mix your preferred car shampoo with water in a bucket and use a sponge or mitt to wash the area you’ll be removing the clear coat from.
If the clear coat is badly damaged, some pieces might come off as you wash the car. Once you’re done cleaning the car, use the best car-drying microfiber towel to completely dry the car.
While this step is optional, you can use a clay bar to remove any residual contaminants on your freshly washed car. However, make sure you wear gloves while dealing with the clay bar to prevent it from contacting your bare skin.
That said, squeeze and shape the clay bar until it is softened. Then spray the freshly washed car with a clay bar lubricant once or twice and move the bar over the surface from side to side in smooth motions.
When the clay bar becomes too dirty, remold it and repeat the above process until you can’t see any residue contaminants on the car.
Step 3: Wet sand the clear coat
Using the sandpaper you had soaked in the water earlier, gently rub the wet sandpaper over the car surface to even out the scratches and remove the clear coat.
Make sure you wet sand the entire car with 400-grit sandpaper before you proceed to finer and higher-grit sandpaper.
Step 4: Continue wet sanding the clear coat with higher-grit sandpaper
Next, gradually move on to finer-grain sandpaper, starting with 800-grit, 1000-grit, and finally 1200-grit sandpaper. Each sandpaper grit helps you remove more and more of the clear coat.
However, you should be careful when sanding the surface as you can easily damage the underlying base/ colored coat if you sand the surface too hard.
Step 5: Protect the delicate parts
Once you’re satisfied with the results after wet-sanding the surface, tape the more delicate car parts before you move on to the next. This includes parts like tail lights, mirrors, rims, screen wipers, handles, and headlights.
Step 6: Dry Sand the surface
Let the car dry completely before you start to dry-sand the surface. Afterward, you can either use 600- or 800-grit sandpaper to dry sand the clear coat until you get smooth and uniform touches. More notably, you should focus on clear coat scratches and sand the surface at an angle of 45 deg.
Step 7: Rinse & dry the car
After sanding the clear coat, rinse the entire car with a hose to remove any grit and particles caused by the sanding process. If you notice that the wastewater is milky, don’t sand the surface any further as doing so can damage the paintwork.
Instead, wipe the surface with a clean microfiber cloth and dry it completely with another clean, dry cloth.
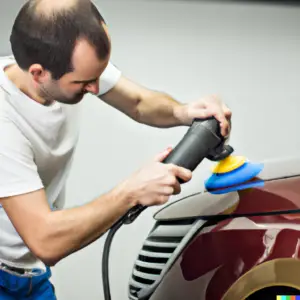
Step 8: Polish & Buff the sanded surface
Now that the car surface is smooth and even, use your electric polishing machine to uniformly apply a polishing compound over the car. Set the motion setting of the polishing machine at a rotation speed of 1200 – 1400 RPM.
More importantly, work in a circular motion to ensure that the entire car surface is polished and buffed.
Alternatively, you can use a 100% wool cloth to buff the surface by hand if you don’t have an electric polishing machine.
However, remember to wear protective gloves and apply the polishing compound sparingly to avoid hand burns or compromising the quality of the outcome.
Step 9: Finish off the polished area
Finally, clean the polished area to remove the remaining particles on the car’s surface to make it shinier and brighter. To accomplish this, apply some spray detailer on the polished surfaces and spread it evenly with an electric polisher to get that extra glossy finish.
Don’t leave the polisher in one spot for too long as it may leave streaks behind or even damage the paintwork. In addition, you can wax your car to give the paint job more evenness and shine, but this step is optional.
Can you use a paint thinner to remove the clear coat without damaging the car paint?
Although paint thinner may remove the clear coat, it will require several applications, thus increasing the chances of removing or damaging the underlying paint.
However, if you want to remove the underlying paint job as well, you can remove the clear coat.
Moreover, some car owners recommend using mineral spirits instead of rubbing away the blemished clear coat areas with fine-grit sandpaper.
On the other hand, auto detailing professionals recommend that you use the tools and agents I’ve listed above and strictly follow the steps below to safely remove the clear coat without damaging the underlying base coat!
Can you use acetone to remove the clear coat?
Acetone is commonly mistaken for alcohol since they’re both colorless. However, unlike alcohol, acetone is a solvent that can dissolve and break down other materials.
For that reason, you can use it to remove fingernail paint and ink in your hand if you accidentally come into contact with it.
In contrast, a clear coat refers to the transparent layer that covers colored coatings to add thickness and protect the colored coat from oxidation.
Interestingly, you can use acetone to remove the clear coat due to its strong formula. Unfortunately, using this method to remove the clear coat will dissolve the colored coat, especially if used excessively.
So, while acetone can remove a clear coat, it may end up dissolving the car’s paintwork. In addition, this solvent is highly flammable as it contains propanone, hydrogen, and carbon.
However, if you still insist on using acetone to remove contaminants or clear coat from your car, use a small amount and rinse the surface with water right away. Alternatively, you can use other products like diluted alcohol and degreasers to remove stubborn stains from your car surface instead of acetone.
Final Words
Although removing the clear coat from the car surface without damaging the paintwork can seem daunting, it’s not hard if you have all the right tools.
Hopefully, after reading this post, you now know all the steps you need to follow as well as the tools and supplies you need to remove the clear coat.
Leave a Reply