This post may contain affiliate links which means I may receive a commission for purchases made through links.
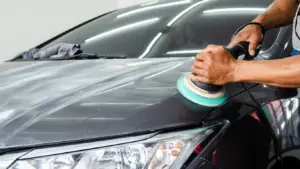
Applying a clear coat to your car will help you obtain an excellent final finish on a repainting job. More importantly, it will restore the transparent paint layer that protects your car’s color coat from damage and oxidation, and give it a glossy shine.
Unfortunately, various problems and difficulties can arise during the clear coat application process, leading to different car paint defects like clear coat peeling.
For that, it’s essential to consider the factors that ensure the correct application and performance of the applied clear coat.
Luckily, that’s exactly what we’ll be talking about in this blog post!
Factors that influence performance and application of the clear coat
1. Preparation of intermediate clear coats
The preparation of the lower paint layers like polyester putty will significantly influence the behavior of the clear coat. For that, it’s important to sand, polish, and clean the surface before you apply the clear coat to achieve an excellent final finish.
This will ensure that the surface you’re applying the clear coat on is free from dirt and impurities. Moreover, this will improve the clear coat’s adhesion to the car surface and prevent any potential car paint defects.
2. Viscosity and mixing ratio of the clear coat
Clear coat mixing ratio refers to the proportion of mixing the clear coat, hardener, and sometimes thinner to achieve the ideal product viscosity & application.
In most cases, the mixing ratio is indicated on the product manufacturer’s technical data sheet or specifications.
So, make sure you always read and follow the instructions when applying the clear coat to your car. Besides, this will help to increase the cleat coat’s performance in terms of product flow, drying time, and final finish.
If possible, use regulated containers with various mixing ratios or a precision weighing scale to get the exact mixing ratio. For instance, a 2:1 mixing ratio requires 2 parts of clear coat, 1 part of hardener, and about 0 – 5% thinner.
3. Clear Coat Application temperature
Regulating the temperature of the clear coat, solvents, and hardeners will also affect the outcome of the final finish. In general, the clear coat should always be at around 20 – 25 deg C (room temperature) during application.
However, the exact temperature will depend on the manufacturer’s instructions and the type of clear coat you’re applying.
In addition, the room temperature will directly affect the outcome of the clear coat finish. For instance, severe room temperatures (whether too hot or too cold) can lead to subsequent car paint problems like popping, blooming, and over-spraying.
To avoid such issues, it’s recommended that you regulate the temperature of your spray painting booth through various means such as heaters and rays. 20 – 23 deg C is considered the ideal room temperature range for clear coat application.
4. Spray gun settings
Applying the clear coat with a spray gun produces a larger cloud of the atomized product than when applying the base coat because more pressure is exercised.
For that, the spray gun you’re using to apply the clear coat should be set with a nozzle opening and pressure rating indicated on the clear coat’s technical data sheet.
In addition, the spray gun should be regulated in a way that allows the clear coat to flow in a fan pattern to generate thin, uniform, and extended coats.
5. Clear Coat Application Method
You should always apply the clear coat in a linear way while keeping the sprayer at the same speed and distance from the car surface during application.
Changing any of these parameters during the clear coat application process will increase the risk of achieving a defective final finish.
Moreover, if you’re applying the clear coat on larger parts, it’s recommended that you work by sections. This will help to prevent the product from overloading in the edges and peripheral areas.
Lastly, if you’re applying an Ultra-High Solid (UHS) clear coat, you should apply a lighter & thinner first layer to wet the surface. However, the 2nd layer should have a higher load and amount of spray product as it will be sprayed at a lower speed.
6 DOs and DONTs when applying car clear coat
1. Don’t apply an excess clear coat
Applying excess or less clear coat on a part of your car surface will lead to a poor finish. Moreover, some parts like flaps, doors, and other vertical parts are particularly sensitive to the excess clear coat.
This can lead to possible car paint defects like sagging clear coats, which is why you should always try to apply clear coats uniformly.
2. Do some research before buying the best clear coat for cars
There are various types of clear coats in the market, including 2-part and single-part formulas. Not to forget they have different application methods. For instance, some come in spray cans, while others can be applied with airbrushes or spray guns.
Either way, it is important to do your due diligence before you buy the best clear coat for your car. For instance, 1K (single-part) products are the most affordable type of clear coat as they don’t need a catalyst, making them ideal for filling scratches and quick touch-ups.
On the other hand, 2-component sprayable clear coats harden quickly and form a more durable finish. More importantly, they’re ideal when you’re working on large areas of your car.
3. Apply Multiple thin layers of Clear Coat
When applying the clear coat of car paint with a paint gun on an aerosol spray can, you need to apply multiple thin layers to achieve a nice, uniform coat. Specifically, you can apply 3 – 4 layers of clear coat to get the glossiest finish.
Applying coats that are too thick increases the risk of getting paint drips and puddling.
However, you should give each layer enough time to dry before you apply another coat. In general, you should wait at least 10 minutes before you apply the 2nd coat. Moreover, the 2nd layer can be slightly thicker than the first for excellent results.
4. Don’t forget to clean the clear coat application equipment
Make sure you regularly clean the paint application equipment including the compressor, spray gun, and compressed air duct after applying the clear coat. This will help you reduce any defect or possible error in the final finish paint for future car painting projects.
For instance, correct cleaning of paint application is the best way to prevent defects like catering and boils. In addition, deep cleaning your car paint equipment will allow you to work in a more orderly and safer working environment.
5. DON’T Rush the job
If you’re planning to apply a clear coat to your car, make sure you have enough time for the project since it’s not a rushed project. In fact, you should move slowly and steadily while overlapping the surface to ensure you get even coverage.
In addition, the clear coat should be thin and have enough coverage to prevent the formation of holes in the clear coat.
If possible, practice first before you spray the clear coat on your car’s exterior. For instance, you can test the product and your application technique on a piece of scrap metal.
6. Wash your car regularly
Lastly, remember to wash your car regularly after applying the clear coat to protect the car’s exterior from wear and weather elements. However, avoid hard brushes or washing techniques that could scratch or nick the paintwork.
Instead, use eco-friendly car wash products and gentler steam cleaning methods to extend the longevity of the clear coat.

Leave a Reply